
HOW TO CHOOSE AND INSTALL YOUR FIRST THEME
This is part two of a four-part series called, “how to start a blog”. If you stumbled upon this post and haven’t gotten a chance to read the rest of the series you can do so by scrolling to the bottom of the page and clicking the links titled with each part.
Choosing a theme is a super important part of creating a profitable blog. You want your blog to be readable, and easy to navigate so that you will have return readers. Return readers make turning your blog into a business much easier. So basically you want a great theme.
CHOOSING A THEME
The key to the best theme for a blog is finding one that is simple enough, responsive, and has a sidebar.
Here are some themes that I like that are free. You can get any of these by logging into your WordPress clicking appearance > Themes > then searching their name which is in the grey at the bottom.


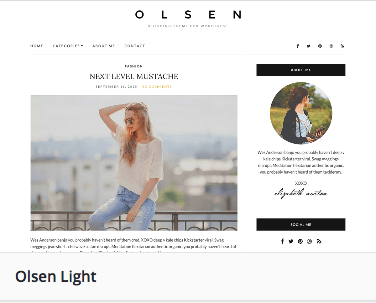

These themes all have a sidebar (place for an about me), header photo place (location for logo) are responsive so they can be used on mobile devices and they are simple so the text is clear and easy to read.
TO INSTALL A THEME:
Navigate to your “Dashboard”
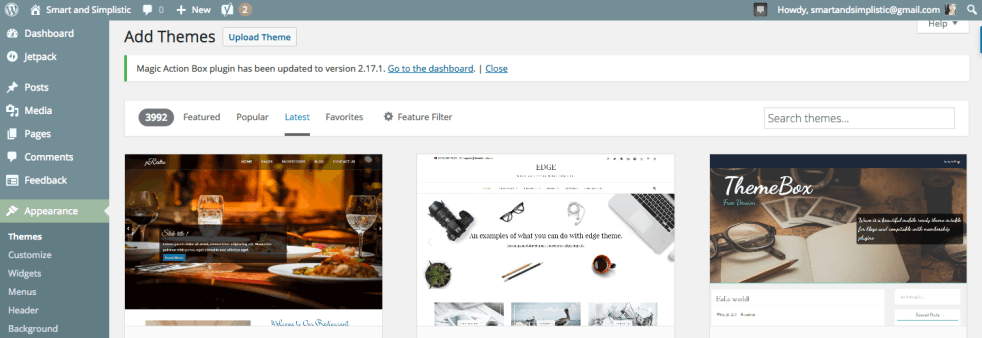
Hover Over “Appearance” then click “Themes”

3. Click “Add New”

4. Search for one of the themes I mentioned above in the search bar or browse themes. I recommend looking through “Latest” I have found some really great free themes there.
5. Once you find a theme that you like you can click, “Install” to install it into a folder where WordPress.org keeps all your themes or preview to see a larger image.
6. Once you are ready to install click install. After installing you should come to this screen.

7. I recommend clicking “Live Preview” there you can change the colors, and set up to see if you like it before activating it.
This is what live preview looks like:

8. Once you get your blog looking how you want to by messing with the stuff in the customization bar click “Save & Activate” and your blog will be ready for action! Then you can continue on and create your logo!
Woohoo! Now you have your first theme!
Ready to make and add a customized header to your blog? click here for the post teaching you how.
Want to look at the other parts of this series? Click on any of these links to go there.
THE OTHER PARTS OF THE SERIES!
You are ready for part three; which you can get byclicking here. We will be talking about how to create your first logo for free!
Here are the links for all of the series:
Part 2: Choosing and Installing Your First Theme (for free)